🚀 Tutorial
As stated in Why ΜΟΧελ?, all you need is a .cif file!
If you don’t have one 👉 IRMOF-1.cif.
Note that in the following examples, path/to/ can be an absolute or relative pathname.
Calculation and visualization of voxels
Calculation
Functional interface:
>>> from moxel.utils import voxels_from_file # Omitting .utils also works.
>>> voxels = voxels_from_file('path/to/IRMOF-1.cif', grid_size=25)
Object-oriented interface:
>>> from moxel.utils import Grid # Omitting .utils also works.
>>> grid = Grid(grid_size=25)
>>> grid.load_structure('path/to/IRMOF-1.cif')
>>> grid.calculate()
>>> np.all(voxels == grid.voxels) # A sanity check.
True
Of course, we are interested in calculating voxels from multiple files. In this case, check:
In all cases, Grid.calculate() is used under the hood to calculate the
voxels. Functions voxels_from_file(), voxels_from_files(),
voxels_from_dir() are just wrappers. To better understand how to use these
functions check: 📖 API Documentation.
Visualization
>>> from moxel.utils import plot_voxels # Omitting .utils also works.
>>> import matplotlib.pyplot as plt
>>> import numpy as np
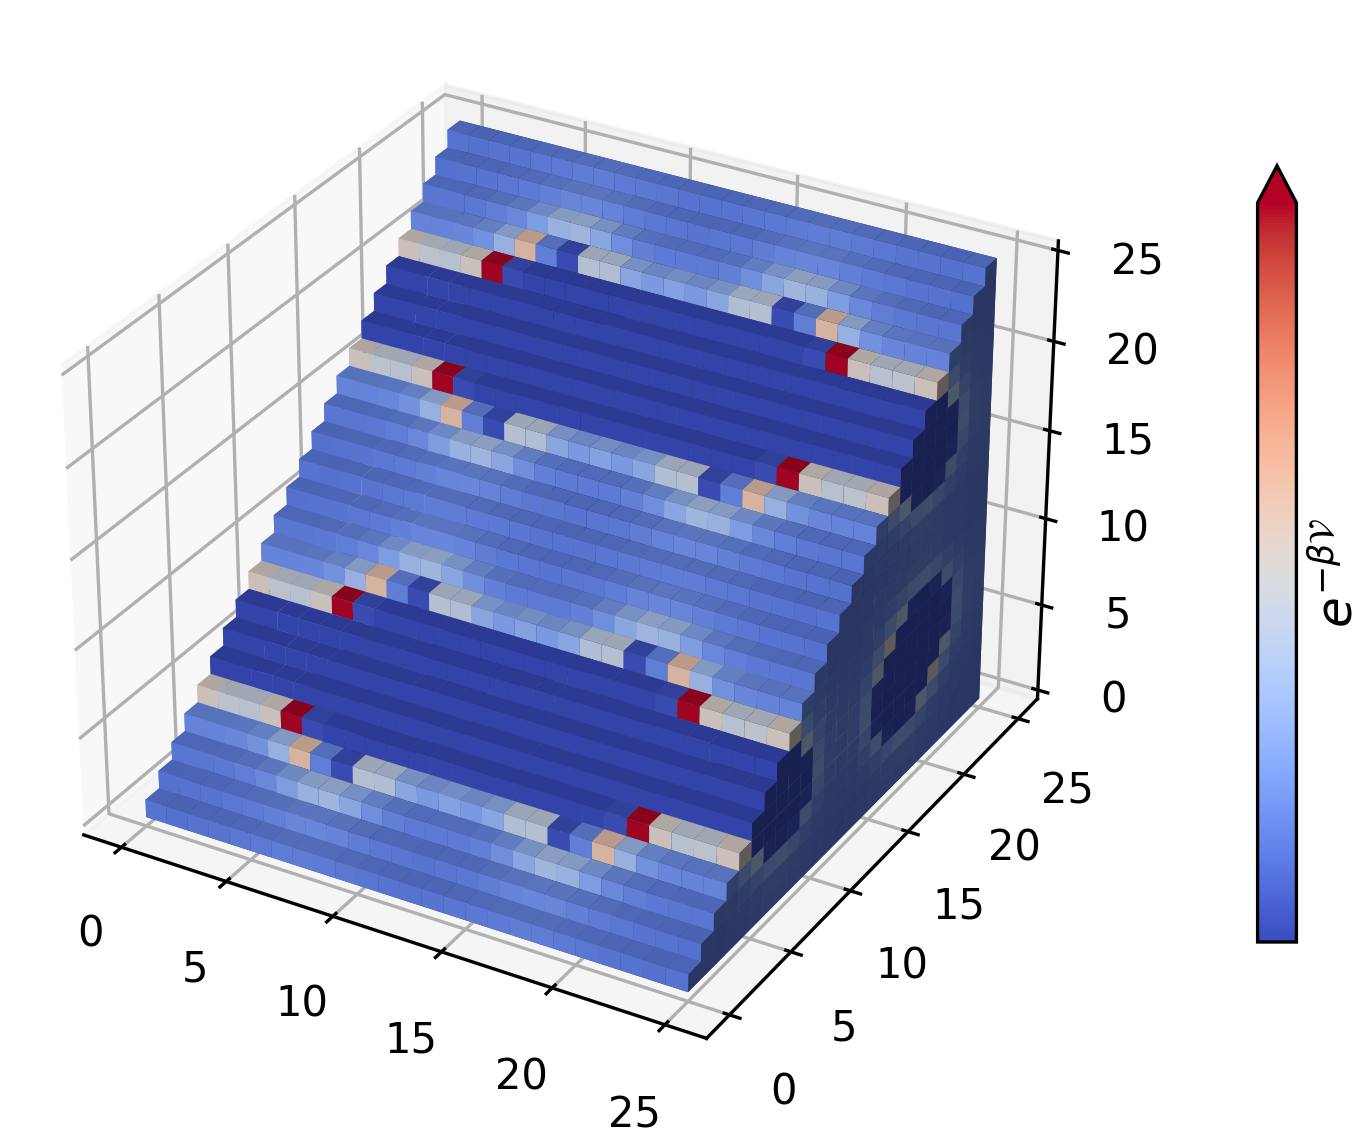
>>> fill_pattern = np.tril(np.full(voxels.shape, True)) # Plot only the lower triangle.
>>> fig = plot_voxels(voxels, fill_pattern=fill_pattern, cmap='coolwarm')
>>> plt.show()
Since voxels is just a np.array check also Plotly and PyVista.
Preparing voxels for a ML pipeline
Here, we examine how to prepare clean ML inputs from a database, that can be later used to train a ML algorithm (e.g. a CNN).
If you don’t have a database 👉 CIFs.zip.
$ unzip path/to/CIFs.zip -d path/to/CIFs
$ ls path/to/CIFs
corrupted_1.cif  corrupted_2.cif  IRMOF-1.cif  ZnHBDC.cif  ZnMOF-74.cif
Ideally, all .cif files should be processable. In this example, we cover the
general case where some .cif files (named as corrupted*) can not be
processed.
Create a directory to store voxels:
$ mkdir path/to/batch
Calculate voxels and store them:
For this step you can also use the ⌨️ Command Line Interface.
>>> from moxel.utils import voxels_from_dir # Omitting .utils also works.
>>> voxels_from_dir('path/to/CIFs/', grid_size=10, out_pathname='path/to/batch/voxels.npy')
$ python -m moxel -n 10 path/to/CIFs -o path/to/batch/voxels.npy
Of course, it is necessary to know the indexing of the generated voxels. Under the hood,
voxels_from_dir()usessorted(os.listdir('path/to/CIFs/')), so we can just use a dictionary to keep track of the indexing:>>> import os, json >>> with open('path/to/batch/names.json', 'w') as fhand: ... json.dump({'names': sorted(os.listdir('path/to/CIFs'))}, fhand, indent=4)
Warning
The directory structure:
batch
├──voxels.npy
└──names.json
is necessary for
batch_clean_and_merge().Clean the voxels:
>>> from moxel.utils import batch_clean_and_merge # Omitting .utils also works.
>>> exit_status = batch_clean_and_merge(['path/to/batch']) # You must pass a list!
Missing voxels found! Cleaning...
>>> exit_status
1
Lets check the contents of
path/to/batchdirectory:$ ls path/to/batch clean_names.json clean_voxels.npy names.json voxels.npy
The file
clean_names.jsoncontains only the names of the processed materials:$ cat path/to/batch/clean_names.json { "names": [ "IRMOF-1.cif", "ZnHBDC.cif", "ZnMOF-74.cif" ] }
The file
clean_voxels.npycontains only 3 samples:>>> import numpy as np >>> clean_voxels = np.load('path/to/batch/clean_voxels.npy', mmap_mode='r') >>> clean_voxels.shape (3, 10, 10, 10)
(optional) Remove
voxels.npyandnames.json:$ rm path/to/batch/{voxels.npy,names.json}